5-Minute DIY Cards | Simple Stamping – Today’s Simple Stamping video is quick, easy, and will save you money on your cardstock too. Just a little Designer Series Paper, a sentiment stamp, and a punch and BOOM you have a card made! I bet you could make more than 1 card in a 5 Miute DIY cards session and just think of the load of handmade cards you could make in 30 minutes!!
Let me share today’s 5-Minute DIY Cards featuring the Incredible Like You or the Part of My Story stamp set…
Don’t you just love that Garden Impressions Designer Paper? How about my big OOPS. I’m so glad Stampin’ Up puts 4 sheets of each design in a package so I could cover that up. That’s not the first time I have adhered a card together upside down. I don’t call that a mistake but a ‘creative opportunity’.
Click the YouTube Button now to SUBSCRIBE so you don’t miss out!
Images: 5-Minute DIY Cards | Simple Stamping Style

What do you think about today’s cards? Are you thinking about giving either of these 5 minute DIY cards a try? I’m curious…. anyone else ever put a card together upside down? Let me know in the comments below!
- Whisper White Thick – 8 ½” x 5 ½”, score and fold at 4 ¼” and 2″ x 3″
- Melon Mambo – 3 ¼” x 4″
- Designer Series Paper – 3″ x 3 ¾”
- Night of Navy Gingham Ribbon – small knot
Here are the supplies I used to create my Designer Paper card | Simple Stamping. To add any of the items you need, just click a pic! THANK YOU for choosing me to be your Stampin’ Up demonstrator!
Want to get the ‘Part of My Story’ stamp set for FREE?
When you place a $50 or more order, you can choose a SALE-A-BRATION item for FREE plus a free package of 250 Adhesive-Backed Sequins from me! Order more, earn more!
Click Here to download the brochure.
Questions about Sale-a-Bration? Just ask or email me at Connie@SimplySimpleStamping.com

I sure appreciate you joining me today. I hope that today’s #simplestamping video inspired you to start cutting up all that Designer Series Paper you’ve been saving for a special occasion. TODAY is that occasions! Make a card, send a card, make someone smile. It’s that easy!
I hope that you have a wonderful Saturday! Have a fantastic weekend everyone!
QUOTE OF THE DAY – “Share your smile with the world. It’s a symbol of friendship and peace.” — Christie Brinkley

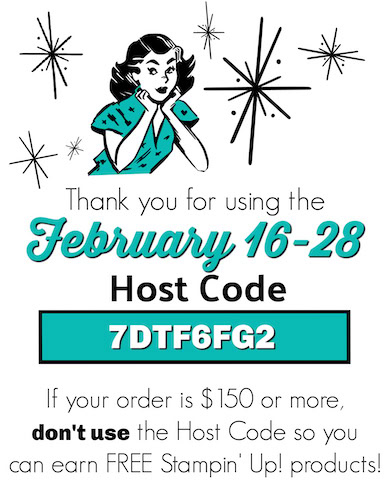
Thank you for shopping with me and for your loyalty to Simply Simple Stamping! I know there are a lot of demonstrators out there to choose from… THANK YOU for choosing me! To show my appreciation, I have something special for you!

If your order is over $30* and you use the FEBRUARY HOST CODE ZNBFNWJA, get ready for a special surprise! Watch your email for my exclusive How Sweet It Is Suite tutorials – a special collection of full color tutorials that focus on the How Sweet It Is Suite on page 14 & 15 of the new Occasions Catalog. You will LOVE this yummy suite!


If your order is over $50* and you use the FEBRUARY HOST CODE ZNBFNWJA, not only will you earn a Sale-a-Bration with your $50 order, you will also receive a package of 250 ADHESIVE-BACKED SEQUINS inside your thank you card plus the exclusive How Sweet It Is Suite tutorials. Wahoo!
If your order is over $150* please don’t use the code because there are Stampin’ Rewards waiting for you! Stampin’ Rewards start at $15. You’ll also earn 2 to 3 Sale-a-Bration items, the ADHESIVE-BACKED SEQUINS and the exclusive How Sweet It Is Suite tutorials.
*before tax/shipping – (1) gift per month per customer


Such great ideas and I love how you left your mistake in. I learn more from mistakes than I do from videos where all goes well! You have such beautiful hands and nails, Connie. Beautiful lady.
You are so right, Hope. We do learn more things from mistakes. I’m glad I left it in too. And thank you for the sweet compliment! It made my morning!
Connie, these are beautiful cards and love how quickly they can come together. Love your clever tip on layering the label using the same punch. Enjoy your weekend!
I’m so glad you enjoyed that tip Hilda! Thanks for tuning in!
Heck yes – upside down, back to front – done them all – is this not a requirement of the passage to being a card maker??? Love your videos and cards Connie – always a joy to watch.
Cheers.
You are 100% right! It’s all part of the craft! 🙂
Been there, done that! You can also use your heat tool and warm up behind the panel to melt and loosen the adhesive and then remove the panel. Luckily, you had the extra paper because the inside looks so pretty now
Beautiful card as always.
Yep! I have used that technique when I adhere something upside down. It works great! This was on the wrong side so I was afraid the back would have adhesive residue or lightly damage the cardstock.
Try to use the hostess code but it said it was invalid. AKSTDAZ7
Kathy, that was my fault. Just place the order without the code. I will be in touch with Stampin’ Up on Tuesday to get it fixed. Sorry for the inconvenience.
At last a tutorial with doable cards for even someone who’s a beginner. Love them all
Thanks Ana! As a beginner, you are going to love this series but just about everything I share here should be pretty simple. It’s what I do!