
Hello hello hello my stamping friends! I have a FUN technique to share with you in today’s TEACH ME THAT. Can you see it?


See that little decorative border? It added such a nice touch and allowed me to fill in a bald spot with a little something pretty.

Are you ready to learn how? Here we go!

SCORED DECORATIVE BORDER

What you need to create the Scored Decorative Border:
- Simply Scored Board or Stampin’ Trimmer
- Stylus Tool
- Silicone Craft Sheet
- Cardstock

- Place your cardstock in the Simply Scored Board. Because you want the score indent to go to the front, turn the cardstock over although it could go either direction.
- Score down, leaving yourself enough space for your sentiment. Mine is going at the bottom so I started on the 3″ mark for my 4″ piece of cardstock

- Move the stylus over ⅛” and score again, this time going about ¼” past the first scored line.

- Move the stylus over ⅛” and score again, going another ¼” past your previous score line.

- Flip the cardstock over and you can see your pretty little border.

- I wanted to add a little dot on the end so I placed the cardstock, upside down, on the Silicone Craft Sheet.
- Press the large end of the stylus onto the end of each line, pressing and rotating it around to create a nice ‘dot’ on the end of each line.

- Doing this adds a little extra touch to your embossed image.

- Stamp your sentiment to the right of the embossed border.

Now you’re ready to create a card using the technique. Here are the measurements for my card but get creative with your project:
- Real Red – 8 ½” x 5 ½”, score and fold at 4 ¼”
- Whisper White – (3) 4” x 5 ¼”

Want to create my SEASON OF CHEER card using this technique? Just click a pic to order!


*Also available in Wood Mount
![]()

I could use a little extra love today. It seems that my email address was hacked into yesterday. Not just UGH but DOUBLE UGH!!!!! I have a BIG mess to clean up today. The biggest one is going through and changing all my passwords. Mr. Awesome got everything fixed for me this morning but the mess. Cleaning up the mess, well, that has got to be my job. Why? WHY do hackers do this sort of thing???? They really need to find something better to do with their time.
Before I do anything I am going to get tomorrow’s blog post done because I promised you something special on last night’s Facebook Live event. I am a woman of my word so I will have your free gift ready for you no matter what.
It’s going to be a 2 pot of coffee kind of day. <sigh>
![]()
 Thank you so much for joining me today! I hope that you enjoyed the quick tutorial on creating decorative borders to fill in empty bald spots on your cards. Give it a try today! Be sure to join me tomorrow for my special free gift I told you about on Facebook Live last night! See ya then!

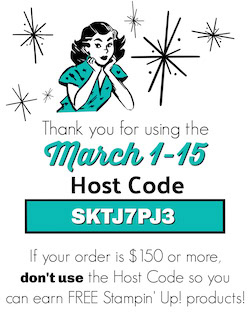
Use the OCTOBER HOST CODE EERAKVCP on your order of $30* or more and I have an incredible pdf tutorial along with exclusive video links just for you. The Flash Card Gimme a Kiss video & tutorial collection is 15-pages of instructions, photos, diagrams, tips, tricks, and general awesomeness so that you can create 4 different Flash Card Hershey Kiss boxes PLUS a bonus tutorial for the Hershey Kiss Daisy bouquet!
Remember, if your order is over $150.00*, DON’T use the Host Code and earn Stampin’ Rewards (Rewards start at $15) plus you’ll also receive the videos & tutorials! BIG win!!!
*Before Tax & Shipping.
Want to order the FLASH CARD GIMME A KISS TUTORIAL collection? Click here!


I pray God Bless you with an extra dose of blessings today. Can’t wait to see you in about 1 month. Thank you for all you do for your team and customers.
Connie I am so sorry that you were hacked. It is such a violation and so time consuming to clean up. Thank you for all you do! Love your blog.
Triple UGH!!!! Feel for you, Connie.
As always you have come through with another super easy but great idea for us. Thanks. I am going to definitely give it a try!!!!!
I love your tip today and the card is oh so pretty. Please remember that you are loved and appreciated by so many. Sending long distance hugs to you today.
So sorry you were hacked. Hope it cleans up easily. Thanks for that quick, sharp idea with the borders. However, (& this may already be I. Your plans), I would lime to know how you created that cute top. I’m sure you used the stitched shaped framlets for that.
Yep, the Stitched Shapes framelits – the smallest one and the one step up from the smallest.
Absolutely gorgeous card Connie, thank you for instructions.
Sorry to hear your “hacker” story! They are total imbeciles!
Mega crafty hugs and love from across the pond
You poor thing. I am so sorry you were hacked.
hugs,
Vovvi
That is so mean. I hope you have recovered from the shock … and the mess….
The card is lovely, I really like it a lot. And the tip with the dots is great. I did the lines before – but with the dots it looks so much more finished. Thank you for all your time and effort. I will most definitely never meet you in person, but over the internet you are a really good crafting friend to me – even if it is one-sided LOL 🙂 All the best from Scotland
Hugs Connie and a big dose of patience, perseverance and laughter. Thanks for your crafty presence in my life?
Always look forward to Thursdays:). Love the technique and love the finished card.
FYI-I just made 25 special pens like you showed in September. Daughter is getting married this weekend. In lieu of a traditional guest book, I am having guests sign custom made memory keeping cards to put in a pocket album. The pens and memory keeping cards will be at each table at the reception. I made my own DSP in their colors for the pens and will also use in the album pockets.
The world would be a better place if people just did what they are supposed to do . . .
that’s wonderful Trish!!!
So sorry about your computer being hacked. I agree that the hackers should do something constructive with their time and leave innocent people alone. I hope you had a successful day in cleaning up the mess. My husband turned on his computer this morning, left for a meeting and when he came back the hard drive would not come on. He was distraught to think he was losing everything, but luckily he found a “guru” who knew how to fix it and by dinner time he was back in business. It is such a lost feeling. On the other hand, when I think of what the people in the areas devastated by the hurricanes and now the fires in California, our problems are so small. I’m sending extra hugs to you today because even small problems can be big issues when they are our problems. Thanks so much for the cute tip on making this pretty card even better with the scored lines. Tomorrow’s another day…and hopefully a better one. Keep smiling!
That is the worst feeling in the world. I had that happen to my website many years ago. Now I have Carbonite that backs up my computer every 10 minutes. I was terrified of losing everything on my computer. I am SO glad you found someone who was able to recover everything. Whew! That is scary!